
Etiwanda Peak Hike Photos


You might also consider
More like Etiwanda Peak Hike
Recommended Reviews - Etiwanda Peak Hike
Start your review...

11 years ago
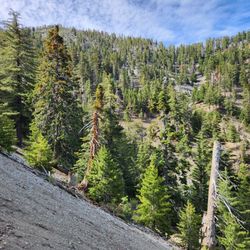
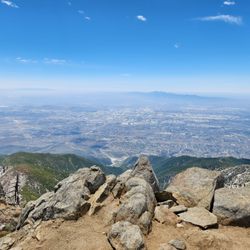
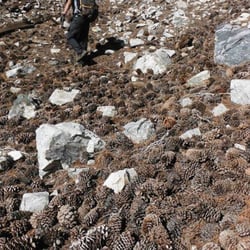
This hike is about 15 miles up and back and 3800' elevation gain. It is an infrequently climbed summit located within a few miles of Cucamonga Peak. It is a fairly difficult hike. The trail is mostly single file with lots of varying sized rocks under foot. If you take Ice House Canyon Trail (instead of the Chapman Trail) to Ice House Saddle, you will have a good, uphill workout with a steady incline most of the way. You will pass several cabins in the first 1/2 mile or so, and this part is pretty easy. Once you pass the last cabin, look ahead and the incline will get noticeably steeper. It's pretty much uphill from there. The incline is not severe to the Saddle, but it does give you a good leg and butt workout and it is hard work. Ice House Saddle is located in a heavily wooded setting and is very peaceful. There will be signs for longer and more difficult hikes, such as the 3 T's and Cucamonga Peak, but there is no signage for Etiwanda. Once you continue on and after a short, easy bit, the trail becomes more difficult than the trail to Ice House Saddle. Just before turning right onto the steep incline up to Cucamonga Peak, go left instead and continue on the flat trail. You will begin to descend into a heavily wooded area and it will feel like you are not going the correct way. Continue on for over a mile, and you will see a very steep trail up and to your right. Take this until you reach your rocky destination of 8,662'. On a clear day, you will be rewarded with gorgeous views parking - lot located at the start of the trail that requires an adventure pass read more

More info about Etiwanda Peak Hike
689 Mount Baldy Rd
Mount Baldy, CA 91759
Directions
Hours
Outdoor Amenities
You might also consider


Etiwanda Peak Hike - hiking - Updated July 2026
Best of Mount Baldy
People found Etiwanda Peak Hike by searching for…
Things to Do in Mount Baldy, CA
Hiking Trails in Mount Baldy, CA
Walking Trails in Mount Baldy, CA
Off Road Trails in Mount Baldy, CA
Waterfalls and Swimming Holes in Mount Baldy, CA
Beautiful Views in Mount Baldy, CA
Scenic View in Mount Baldy, CA
Places to Take Pictures in Mount Baldy, CA
Fall Foliage in Mount Baldy, CA
Nature Trails in Mount Baldy, CA
Fishing Spots in Mount Baldy, CA
Secret Spots in Mount Baldy, CA
Picnic Areas in Mount Baldy, CA
Swimming Lakes in Mount Baldy, CA
Dog Friendly Hiking Trails in Mount Baldy, CA
Browse Nearby
BEST of Mount Baldy, California Parks near Etiwanda Peak Hike
BEST of Mount Baldy, California Coffee near Etiwanda Peak Hike
BEST of Mount Baldy, California Scenic View near Etiwanda Peak Hike
BEST of Mount Baldy, California Restaurants near Etiwanda Peak Hike
BEST of Mount Baldy, California Things to Do near Etiwanda Peak Hike
BEST of Mount Baldy, California Visitor Centers near Etiwanda Peak Hike
BEST of Mount Baldy, California Sledding near Etiwanda Peak Hike
BEST of Mount Baldy, California Breakfast near Etiwanda Peak Hike
BEST of Mount Baldy, California Campgrounds near Etiwanda Peak Hike