Cucamonga Peak Photos


You might also consider
More like Cucamonga Peak
Recommended Reviews - Cucamonga Peak
Start your review...

Reviews With Photos

I did this hike over the weekend via Ice House Canyon. I started an hour later than I wanted to, due to issues finding parking in the lot and down the street. I started this hike at 8:10am on Sunday and noticed many people ahead of us and behind us. The hike from ice house canyon to icehouse saddle is 3.6 miles. This part of the hike was beautiful and had some inclines. Majority of this part of the hike is covered with trees. At icehouse saddle to Cucamonga peak it's 2.4 miles. Although this stretch is shorter, the last 15-20 mins of this hike were brutal for me. I consider myself an avid hiker but nothing of this length and difficulty level. The last incline of this hike just before the top, I had to stop every 5 mins of so and just rest. Most hikers I noticed had poles, I didn't, and I think these would of helped for sure. The view at the top of the peak was definitely worth it and good time to recharge and eat. There was a big group at the top of the peak taking pictures with the signs there for 25-30 mins. So be mindful of others who want to snap some shots too. Coming down was easier of course but there are still some inclines going back which were brutal. This hike took us 7 hours which included some stops at the top of the beach and icehouse saddle. Coming down from the saddle you can feel the heat more as you lose elevation, that's why it's best to do this hike before 6am, so you'll be done with this hike by 2pm the latest. This hike in total was 11.6 miles with top elevation gain of 8,859'. I enjoyed this hike, but I need more practice with hikes of this difficulty and distance and elevation. It was brutal for my friend and I at the end and I was never so happy to finally see my car!

Difficulty: Medium Mileage: ~12 Pets: Dog friendly View: clouds, LA & San Bernardino County What to bring: At least 3 liters, snacks, hat, poles (optional) Parking: limited Icehouse Canyon parking trail Fee: free, permit required for trail Time: ~5.0 to 6.0 hours Elevation gain: 4000ft SoCal 6 pack of peaks! Go early, arrive before 5:30am. We went on the Saturday of Memorial Day weekend and it was packed. We literally got the last parking and we arrived at 5:45am. The trail surprisingly wasn't too packed. From trail to saddle it took us about 1.5 hours and about another 2 hours to the top. Took a 3 minute break at the top. Took me 2 hours to go down, jogging. My friend took 2.5 hours down, so total time around 5.5-6 hours, about 4,000ft elevation gain. The top gets busy and IG hoes be hogging the picture spot. There really should be a time limit on it. We waited 10 minutes so one girl can pose hundreds of different poses. She was there for 20 minutes! SMH. The trail itself is pretty easy. There are parts were you can go up the wrong way instead of the switchbacks. Definitely one of the easier hikes in this area. We got the views over the clouds, so didn't see the city views. I like this trail, easy if you're an avid hiker.

HARD, LONGER and LONGER to the end =/ Before you even start this hike, grab about 5 to 6 water bottle or filter pills, trust me this 6 miles up and back down will be no joke at all. I recommend to start at 5:30 - 6 am, it's really to beat the sun and parking will be full already after that time. Very important too if you haven't done incline hikes, stretch really well and drink a lot of water. The worst is you'll be like me and hike the last 6 miles hurting with leg cramps and moving slower than a turtle :( Let's do this hike! The first 3 and half miles is not as bad, you'll go up, side ways, walk on rocks, always follow the trail. Be aware of rattle snakes too, they'll pop out from time to time. Once you get half way which should take you 3 and half hours, depending on how many breaks. There will be a lot people probably eating and watering down. Relax, eat and prepare yourself. You're are almost there. You'll see a lot of signs going to other trails, look for Cucamonga Peaks. It should be on the left side and say 2.6 miles. Now if you never heard of switch backs, you'll know after this and hate it for the rest of your life haha. Basically zig zagging so many times, while the sun beam on you. Take your breaks and I would suggest breathing from your nose cause you might have headaches. Don't give up, keep pushing yourself. At the last 8 mins almost to the peaks, my legs started cramping and hurting. I had to wait for an hour to start back going up which totally sucks. Incase you feel like quitting don't cause you can do it, just pace yourself. Alright you should be at the top, enjoy and take many selfie cause YOU deserve it :) The last 6 miles back is coming, follow the same routine . If your out of water, you'll have a chance to fill up. You'll hear it and it's off to your left, it's not on the trail but the side of it. Stop, you'll jump down by now. Many people said it's okay to just drink the water but it doesn't hurt to have a filter pill just incase. All in all this was harder then it sounds, the view was alright in my opinion. It's the challenge for me which out weighed everything...

If you're a casual "nature walk" type of hiker be prepared for a challenge if you're coming to Cucamonga Peak for the first time. This trail is pretty challenging, but not impossible for beginners, it just might take more time to get through it. The trail is pretty much a consistent incline up to the peak with a little dip between miles 4-5 then the incline begins again as you near the peak. Four miles the hike you'll get to the Saddle back something, I forget the name but it's pretty much a connection point where other trails meet. It's also a good spot to take a break, & refuel with the snacks your brought. From that point you've got about 2 more miles till you reach the peak, the last mile of the peak is a lot of soft dirt and loose rocks on the trail so be careful going through that section. On the return back the decline is steady enough in certain spots that you can run/jog back, just be-careful when you're going around/on top of some rocks. A lot of them seem big enough/sturdy to support you hoping on them but a lot are loose and will move. I'd recommend bringing a water back pack & possible a few water bottles. I made it through Half Dome in Yosemite a few months back with water to spare in my camel back, with 2 miles left head out of here I already ran out of water. For parking make sure you stop at the visitor center to get an adventure pass (side note my buddy got a annual pass when we were At Yosemite last month & the parks out here honor that pass so we didn't have to pay the fee for the adventure pass.) On the trail that is pretty much zero reception for most phone until you reach the peak so keep that in mind too. And finally if you've made it though this hike & looking for something a little more challenging, Mt. baldy is just across the way in this same mountain range.

I was here on Saturday, June 24th. I arrived at the parking lot at 6am and it was completely full. There were cars parked along the side of Mt Baldy Rd. The weather was perfect. Not too hot, not too cold. There are a few small patches of snow but no spikes needed. They have restrooms at the trailhead. I consider this hike moderate. The last .5 of a mile to the peak was hard for me. There's a gradual incline from the start. It's pretty rocky so watch out for your ankles! Overall, it was a great hike. Happy Hiking!

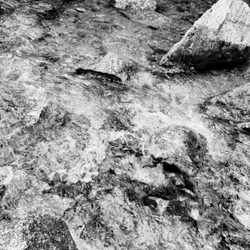
Excellent hike, strenuous, but worth the views at the top. The hike starts out along a beautiful creek with cabins sprinkled around the area. Small waterfalls trickled down through the trees. Once the elevation began there were switchbacks and some gravel areas that you have to be careful and make sure you have your footing, some narrow spots. Backpackers were carrying tenting supplies to spend the night. Be prepared for all kinds of weather, it can be icy and you will need crampons or spikes. It gets very windy and blustery the higher you go. Take breaks and bring lots of water and energy food, you will need it. This is 13 miles. When you get to the top you have to find the sign, there are a few and plenty of spots to catch a view. I do not recommend this hike for children or dogs, yet I saw both. Trekking poles would be good if you need them, I did not use them and was fine. Wear a mask when you pass people, be prepared to have it ready, some areas of the trail are very narrow and not always a place to step off to the side 6 feet apart. Wear good hiking shoes, sunscreen, and have fun!

This is my hardest peak challenge yet! 13 GREULING Miles of Steep, icy inclines. Micro spikes or crampons are a must this time of year. This trail is rated as difficult & extremely difficult in the presence of ice and snow. The fall colors were gorgeous in Icehouse canyon. The snow was intermittent at this point & Walking creek side along the forest path strewn with gorgeous yellow leaves and the smells of Autumn were reminiscent of my childhood. From the saddle the snow and ice were consistent and the trail was difficult to follow the last mile and required rock scrambling. The Panoramic reward was Fantastic; from Palm Springs to Downtown Los Angeles & CaTaLinA. Bring at least 2liters of water & gps is def useful. If you're thinking about the challenge I would say Make Sure You Prepare & DO IT!

The 2nd Peak of the Six Pack of Peaks Challenge. I enjoyed this one much more than Mt Wilson and I thought it was easier. Yes, it is less miles but more elevation so my thunder thighs were cramping up near the end. Its about 3.1 miles from the bottom to the Saddle which most people take breaks. From the Saddle its 2.4 miles to the top but those are the most challenging miles of the hike. Overall it took is less than 6 hours including our 30min break at the top for photos. The hike down was a breeze. Parking lot is small so be prepared to park along the road. Don't forget your adventure pass!

SPOILER If you've seen my previous hike reviews as much as I am for adventures and the art of getting lost, sometimes I am on a time constraint. As much as I enjoyed the experienced and time wandering in the wild, I REALLY needed to get where I needed to be. Directions: This is close to the Mt Baldy Hike basically there will be a fork for Mt. Baldy, make sure you turn right. Hiking Difficulty: Medium/Hard It's difficult in the winter but less difficult in the fall. My friend did slip on this trail so please do be careful. The incline is pretty tough, the switchbacks are a tease and parts of the hikes are narrow. This is probably my favorite place for a photo ops. What's beautiful about this place is it's different scenery from the view to the creek. I can see why people camp here. Advice: * Bring food, bug spray/net, sun block, hiking shoes, and water, * 1 of the Six Pack of Peaks Challenge * This is no hidden gem. Come around 7am or earlier for parking * Adventure Pass applies for legit parking spaces and not on the hill.

i have to say, this is an ass-kicking hike. I really underestimated this. in my own perfect little world, this was supposed to be a 6 hours round trip hike, but it actually took us 10 hours. reaching the ice house saddle was easy, then it's brutal getting to the peak. we were trying to make it to see the clouds floating around but missed it by like an hourish. saw it on our way up, but by the time we got to the peak, all the clouds were gone. bring plenty of snacks and water (you'll need it) It was a good hike, and beginners can do it, but it will be hard.

It's not about the destination, it's about the journey. That's the old saying, of which 9 times out of 10 I would agree with. But in this case, I would have to disagree, it's actually all about the destination, Cucamonga Peak that is! By far the absolute, best view in the house! If you are in SoCal and want to see it from up above, then Cucamonga Peak is the place to see it from. Spectacular view from this place, but it will cost you a few hours of hike time. Come early or expect traffic, both on the hiking trail and the parking lot. And I mean early arrival, like no later than 7am. Enjoy the beautiful scenery along the hike, spring or fall are the best times. Bring plenty of water to hydrate you, and some snacks to enjoy along the way. If you are really adventurous and daring, spend an overnight at the peak during the summer, you won't regret it, I promise! My picture is a view at night time, absolutely phenomenal view at night! Don't forget your adventure pass!

Did this hike on a Friday morning aroind 1030am. The parking lot was about 60-70% filled. On paper this is a 12.4 mile hike or 6.2 mile one way. But my gps said I went for a total of 16.5 miles. It took about 4 hours to hike to the top of Cucamonga Peak and 2.5 hrs to come down, with an extra hour of eating lunch, taking pictures, taking breaks and just relaxing at the peak. There's about 4300 feet in elevation gains, and some areas the trail is at a 80% grade. To the point where your upper body is almost parallel to the ground. The trail is naturally maintained by mother nature. But its easy enough to demarcate where the trail is. I did get lost once around the quarry area but I followed the general rule of if your hiking up the mountain, keep climbing upwards and if your coming down the mountain just keep heading down... At the beginning, its a leisurely slightly uphill climp with the river to your right. Eventually you get to the rocks and gravel portion which is where I got a little bit lost, buy look for the different rock formations to keep you on the right path, coming down it was easier to traverse and not get lost. Then you encounter about 18 high incline switchbacks going up the mountain before you get to Ice saddle. The saddle is a nice place to take a break or have lunch and regroup. There are multiple trails that break off here. But the cucamonga peak is to the far right of the saddle, following the cucamonga peak trail and another 2.6 miles or so to the peak. Its about 0.6 miles to the old miners hole and theres actually some down hill which is great!! But then once you hit the other mountain its about 17 switchbacks of high gradient, butt burning, trouble breathing climb. It goes from about 7600 feet at the saddle to 8856 ft at the peak so a climb of more than 1200 ft. Everything done before the miners hole is easy compared to the final 2 mile climb up the mountain to cucamonga peak. Not only are you tired, but your calves are sore. The air is thin. The wind chill is significant, and there's some parts where its just inches before you fall down the hill. But its well worth it!!! With beutiful views of the other peaks. You can see the cities north of the mountain, at one point you can even see the skyscrappers of downtown LA. And once you reach the top you can see the majority of the IE, reaching as far as the Corona mountains and as far west as downtown and as far east as 215 and everything inbtwn. The air is fresh and crisp as you sit above the smog amongst the clouds. Its quite a sight to behold. This hike is definitely not for the beginning hikers or for peopl who do not lead a physically active lifestyle. I run about 6 miles on a regular basis, I've done P-90 X3 multiple times and run spartan races. But this trail had me hunched over gasping for air multiple times, as well as stretching out my sore calves. I brought about 3 liters of water and only consumed 2 liters because it wasen't too hot. And had a PB+J with banana sandwich, 2 cups of grapes, a chewy bar and a 10g protein beef jerky stick and I wasn't too hungry at the end of it. I highly recommend doing some research prior to hiking this trail. Sites that helped me was the information found on the alltrails app as well as the hiking guy at https://hikingguy.com/hiking-trails/best-la-hikes/cucamonga-peak-hike.

Just got back from the hike. Boy am I pooped. It was not for the faint hearted. I barely made it to the top :( Parking: buy a parking pass from the ranger station or go to a sporting goods store such as REI or Big 5 for $5. The parking lot fills up past 7:30, so expect to park along the street leading up to the Trail head lot. There are many signs that say no parking, but many people don't seem to care. I talked to a ranger there and they usually look the other way if you show your parking pass and don't obstruct the street. So please do yourself a favor and get a parking pass or expect a ticket. Pathways: There are lots of uneven surfaces and rocks throughout the way to the top. The Ice Box Trail that leads to the Cucamonga Trail is fairly wide but part of the Trail goes through a dry creek bed so there are lots of larger rocks and boulders. Once you begin to take Cucamonga Trail (the one that goes up to the peak), it becomes very narrow and rocky. Some parts of the Trail are gravelly and you even have to walk on a small stretch considered a fairly tamed skree. It becomes very steep with many switchbacks. Also, the last stretch before you get to the top, look for a ghetto sign that points towards up the hill full of rocks. That is the way to the peak. It doesn't really look like a Trail tbh. Tips/comments: -The altitude is pretty high so take it very slowly -Bring lots of water! I only brought 2L with a water bottle. That was barely enough for me. No way to refill water -Hiking shoes and poles are not necessary to complete the hike but it made my unfit self be able to survive. -There was virtually no cell reception so be extra vigilant. -No bathrooms at all; nature is your bathroom. Bury your poop 3"-6" deep -there are many hikers that do an overnight backpack trek -please have etiquette and allow people going up the Trail the right of way

Ontario Peak was my first peak hike ever, but Cucamonga solidified my love for hiking and my goal is to climb all the SoCal peaks. I hiked this in November 2024 and it was cold! However, the cloud coverage was absolutely breaktaking. I had never seen anything like it before. It is inspirational and captivating. Hiking poles recommended and slow and steady will always get the job done. I carpooled and we arrived early for parking. An adventure pass is required. Please go out there and create your own adventure. read more


+ Great hike. Exhilarating, breathtaking (literally and figuratively). . The hike takes about 12 miles, 6-8 hours, and about 4100' elevation gain. + Good views of San Gabriel mountains and LA county. + There was one shared Cucamonga Peak sign at the summit to hold for photos. - Parking on a Saturday at 6am gets very crowded. Take heed. Arrive early or park a 1-2min walk down the street. - The only restrooms are the two at the trailhead. No hand sanitizers. Better than nothing. Tips: . Bring plenty snacks and +3L of water. . I recommend checking out HikingGuy's guide before you go: https://hikingguy.com/hiking-trails/los-angeles-hikes/cucamonga-peak-hike/ . And get a hiking parking pass ($5) to scratch off your visit date to keep on your dashboard. read more
. - Hiking Near Me - Mount Baldy, California")
. Sort-of potato chip photo spot. - Hiking Near Me - Mount Baldy, California")
4 years ago
A very enjoyable and challenging hike. My first time hiking 10 miles straight in a single day, shout out to my legs for not quitting on me. We did not summit on this day, but as Arnold once said.... "I'll be back". We made it to the "saddle", which is about 2 miles from the summit. We were treated with nice views for our efforts. Come early as parking fills up fast, and pray your legs and cardio are ready for what is to come. read more


I did this hike over the weekend via Ice House Canyon. I started an hour later than I wanted to, due to issues finding parking in the lot and down the street. I started this hike at 8:10am on Sunday and noticed many people ahead of us and behind us. The hike from ice house canyon to icehouse saddle is 3.6 miles. This part of the hike was beautiful and had some inclines. Majority of this part of the hike is covered with trees. At icehouse saddle to Cucamonga peak it's 2.4 miles. Although this stretch is shorter, the last 15-20 mins of this hike were brutal for me. I consider myself an avid hiker but nothing of this length and difficulty level. The last incline of this hike just before the top, I had to stop every 5 mins of so and just rest. Most hikers I noticed had poles, I didn't, and I think these would of helped for sure. The view at the top of the peak was definitely worth it and good time to recharge and eat. There was a big group at the top of the peak taking pictures with the signs there for 25-30 mins. So be mindful of others who want to snap some shots too. Coming down was easier of course but there are still some inclines going back which were brutal. This hike took us 7 hours which included some stops at the top of the beach and icehouse saddle. Coming down from the saddle you can feel the heat more as you lose elevation, that's why it's best to do this hike before 6am, so you'll be done with this hike by 2pm the latest. This hike in total was 11.6 miles with top elevation gain of 8,859'. I enjoyed this hike, but I need more practice with hikes of this difficulty and distance and elevation. It was brutal for my friend and I at the end and I was never so happy to finally see my car! read more


Difficulty: Medium Mileage: ~12 Pets: Dog friendly View: clouds, LA & San Bernardino County What to bring: At least 3 liters, snacks, hat, poles (optional) Parking: limited Icehouse Canyon parking trail Fee: free, permit required for trail Time: ~5.0 to 6.0 hours Elevation gain: 4000ft SoCal 6 pack of peaks! Go early, arrive before 5:30am. We went on the Saturday of Memorial Day weekend and it was packed. We literally got the last parking and we arrived at 5:45am. The trail surprisingly wasn't too packed. From trail to saddle it took us about 1.5 hours and about another 2 hours to the top. Took a 3 minute break at the top. Took me 2 hours to go down, jogging. My friend took 2.5 hours down, so total time around 5.5-6 hours, about 4,000ft elevation gain. The top gets busy and IG hoes be hogging the picture spot. There really should be a time limit on it. We waited 10 minutes so one girl can pose hundreds of different poses. She was there for 20 minutes! SMH. The trail itself is pretty easy. There are parts were you can go up the wrong way instead of the switchbacks. Definitely one of the easier hikes in this area. We got the views over the clouds, so didn't see the city views. I like this trail, easy if you're an avid hiker. read more


HARD, LONGER and LONGER to the end =/ Before you even start this hike, grab about 5 to 6 water bottle or filter pills, trust me this 6 miles up and back down will be no joke at all. I recommend to start at 5:30 - 6 am, it's really to beat the sun and parking will be full already after that time. Very important too if you haven't done incline hikes, stretch really well and drink a lot of water. The worst is you'll be like me and hike the last 6 miles hurting with leg cramps and moving slower than a turtle :( Let's do this hike! The first 3 and half miles is not as bad, you'll go up, side ways, walk on rocks, always follow the trail. Be aware of rattle snakes too, they'll pop out from time to time. Once you get half way which should take you 3 and half hours, depending on how many breaks. There will be a lot people probably eating and watering down. Relax, eat and prepare yourself. You're are almost there. You'll see a lot of signs going to other trails, look for Cucamonga Peaks. It should be on the left side and say 2.6 miles. Now if you never heard of switch backs, you'll know after this and hate it for the rest of your life haha. Basically zig zagging so many times, while the sun beam on you. Take your breaks and I would suggest breathing from your nose cause you might have headaches. Don't give up, keep pushing yourself. At the last 8 mins almost to the peaks, my legs started cramping and hurting. I had to wait for an hour to start back going up which totally sucks. Incase you feel like quitting don't cause you can do it, just pace yourself. Alright you should be at the top, enjoy and take many selfie cause YOU deserve it :) The last 6 miles back is coming, follow the same routine . If your out of water, you'll have a chance to fill up. You'll hear it and it's off to your left, it's not on the trail but the side of it. Stop, you'll jump down by now. Many people said it's okay to just drink the water but it doesn't hurt to have a filter pill just incase. All in all this was harder then it sounds, the view was alright in my opinion. It's the challenge for me which out weighed everything... read more


If you're a casual "nature walk" type of hiker be prepared for a challenge if you're coming to Cucamonga Peak for the first time. This trail is pretty challenging, but not impossible for beginners, it just might take more time to get through it. The trail is pretty much a consistent incline up to the peak with a little dip between miles 4-5 then the incline begins again as you near the peak. Four miles the hike you'll get to the Saddle back something, I forget the name but it's pretty much a connection point where other trails meet. It's also a good spot to take a break, & refuel with the snacks your brought. From that point you've got about 2 more miles till you reach the peak, the last mile of the peak is a lot of soft dirt and loose rocks on the trail so be careful going through that section. On the return back the decline is steady enough in certain spots that you can run/jog back, just be-careful when you're going around/on top of some rocks. A lot of them seem big enough/sturdy to support you hoping on them but a lot are loose and will move. I'd recommend bringing a water back pack & possible a few water bottles. I made it through Half Dome in Yosemite a few months back with water to spare in my camel back, with 2 miles left head out of here I already ran out of water. For parking make sure you stop at the visitor center to get an adventure pass (side note my buddy got a annual pass when we were At Yosemite last month & the parks out here honor that pass so we didn't have to pay the fee for the adventure pass.) On the trail that is pretty much zero reception for most phone until you reach the peak so keep that in mind too. And finally if you've made it though this hike & looking for something a little more challenging, Mt. baldy is just across the way in this same mountain range. read more


3 years ago
I was here on Saturday, June 24th. I arrived at the parking lot at 6am and it was completely full. There were cars parked along the side of Mt Baldy Rd. The weather was perfect. Not too hot, not too cold. There are a few small patches of snow but no spikes needed. They have restrooms at the trailhead. I consider this hike moderate. The last .5 of a mile to the peak was hard for me. There's a gradual incline from the start. It's pretty rocky so watch out for your ankles! Overall, it was a great hike. Happy Hiking! read more


Excellent hike, strenuous, but worth the views at the top. The hike starts out along a beautiful creek with cabins sprinkled around the area. Small waterfalls trickled down through the trees. Once the elevation began there were switchbacks and some gravel areas that you have to be careful and make sure you have your footing, some narrow spots. Backpackers were carrying tenting supplies to spend the night. Be prepared for all kinds of weather, it can be icy and you will need crampons or spikes. It gets very windy and blustery the higher you go. Take breaks and bring lots of water and energy food, you will need it. This is 13 miles. When you get to the top you have to find the sign, there are a few and plenty of spots to catch a view. I do not recommend this hike for children or dogs, yet I saw both. Trekking poles would be good if you need them, I did not use them and was fine. Wear a mask when you pass people, be prepared to have it ready, some areas of the trail are very narrow and not always a place to step off to the side 6 feet apart. Wear good hiking shoes, sunscreen, and have fun! read more


6 years ago
This is my hardest peak challenge yet! 13 GREULING Miles of Steep, icy inclines. Micro spikes or crampons are a must this time of year. This trail is rated as difficult & extremely difficult in the presence of ice and snow. The fall colors were gorgeous in Icehouse canyon. The snow was intermittent at this point & Walking creek side along the forest path strewn with gorgeous yellow leaves and the smells of Autumn were reminiscent of my childhood. From the saddle the snow and ice were consistent and the trail was difficult to follow the last mile and required rock scrambling. The Panoramic reward was Fantastic; from Palm Springs to Downtown Los Angeles & CaTaLinA. Bring at least 2liters of water & gps is def useful. If you're thinking about the challenge I would say Make Sure You Prepare & DO IT! read more


The 2nd Peak of the Six Pack of Peaks Challenge. I enjoyed this one much more than Mt Wilson and I thought it was easier. Yes, it is less miles but more elevation so my thunder thighs were cramping up near the end. Its about 3.1 miles from the bottom to the Saddle which most people take breaks. From the Saddle its 2.4 miles to the top but those are the most challenging miles of the hike. Overall it took is less than 6 hours including our 30min break at the top for photos. The hike down was a breeze. Parking lot is small so be prepared to park along the road. Don't forget your adventure pass! read more


SPOILER If you've seen my previous hike reviews as much as I am for adventures and the art of getting lost, sometimes I am on a time constraint. As much as I enjoyed the experienced and time wandering in the wild, I REALLY needed to get where I needed to be. Directions: This is close to the Mt Baldy Hike basically there will be a fork for Mt. Baldy, make sure you turn right. Hiking Difficulty: Medium/Hard It's difficult in the winter but less difficult in the fall. My friend did slip on this trail so please do be careful. The incline is pretty tough, the switchbacks are a tease and parts of the hikes are narrow. This is probably my favorite place for a photo ops. What's beautiful about this place is it's different scenery from the view to the creek. I can see why people camp here. Advice: * Bring food, bug spray/net, sun block, hiking shoes, and water, * 1 of the Six Pack of Peaks Challenge * This is no hidden gem. Come around 7am or earlier for parking * Adventure Pass applies for legit parking spaces and not on the hill. read more


i have to say, this is an ass-kicking hike. I really underestimated this. in my own perfect little world, this was supposed to be a 6 hours round trip hike, but it actually took us 10 hours. reaching the ice house saddle was easy, then it's brutal getting to the peak. we were trying to make it to see the clouds floating around but missed it by like an hourish. saw it on our way up, but by the time we got to the peak, all the clouds were gone. bring plenty of snacks and water (you'll need it) It was a good hike, and beginners can do it, but it will be hard. read more


7 years ago
It's not about the destination, it's about the journey. That's the old saying, of which 9 times out of 10 I would agree with. But in this case, I would have to disagree, it's actually all about the destination, Cucamonga Peak that is! By far the absolute, best view in the house! If you are in SoCal and want to see it from up above, then Cucamonga Peak is the place to see it from. Spectacular view from this place, but it will cost you a few hours of hike time. Come early or expect traffic, both on the hiking trail and the parking lot. And I mean early arrival, like no later than 7am. Enjoy the beautiful scenery along the hike, spring or fall are the best times. Bring plenty of water to hydrate you, and some snacks to enjoy along the way. If you are really adventurous and daring, spend an overnight at the peak during the summer, you won't regret it, I promise! My picture is a view at night time, absolutely phenomenal view at night! Don't forget your adventure pass! read more

8 years ago
Did this hike on a Friday morning aroind 1030am. The parking lot was about 60-70% filled. On paper this is a 12.4 mile hike or 6.2 mile one way. But my gps said I went for a total of 16.5 miles. It took about 4 hours to hike to the top of Cucamonga Peak and 2.5 hrs to come down, with an extra hour of eating lunch, taking pictures, taking breaks and just relaxing at the peak. There's about 4300 feet in elevation gains, and some areas the trail is at a 80% grade. To the point where your upper body is almost parallel to the ground. The trail is naturally maintained by mother nature. But its easy enough to demarcate where the trail is. I did get lost once around the quarry area but I followed the general rule of if your hiking up the mountain, keep climbing upwards and if your coming down the mountain just keep heading down... At the beginning, its a leisurely slightly uphill climp with the river to your right. Eventually you get to the rocks and gravel portion which is where I got a little bit lost, buy look for the different rock formations to keep you on the right path, coming down it was easier to traverse and not get lost. Then you encounter about 18 high incline switchbacks going up the mountain before you get to Ice saddle. The saddle is a nice place to take a break or have lunch and regroup. There are multiple trails that break off here. But the cucamonga peak is to the far right of the saddle, following the cucamonga peak trail and another 2.6 miles or so to the peak. Its about 0.6 miles to the old miners hole and theres actually some down hill which is great!! But then once you hit the other mountain its about 17 switchbacks of high gradient, butt burning, trouble breathing climb. It goes from about 7600 feet at the saddle to 8856 ft at the peak so a climb of more than 1200 ft. Everything done before the miners hole is easy compared to the final 2 mile climb up the mountain to cucamonga peak. Not only are you tired, but your calves are sore. The air is thin. The wind chill is significant, and there's some parts where its just inches before you fall down the hill. But its well worth it!!! With beutiful views of the other peaks. You can see the cities north of the mountain, at one point you can even see the skyscrappers of downtown LA. And once you reach the top you can see the majority of the IE, reaching as far as the Corona mountains and as far west as downtown and as far east as 215 and everything inbtwn. The air is fresh and crisp as you sit above the smog amongst the clouds. Its quite a sight to behold. This hike is definitely not for the beginning hikers or for peopl who do not lead a physically active lifestyle. I run about 6 miles on a regular basis, I've done P-90 X3 multiple times and run spartan races. But this trail had me hunched over gasping for air multiple times, as well as stretching out my sore calves. I brought about 3 liters of water and only consumed 2 liters because it wasen't too hot. And had a PB+J with banana sandwich, 2 cups of grapes, a chewy bar and a 10g protein beef jerky stick and I wasn't too hungry at the end of it. I highly recommend doing some research prior to hiking this trail. Sites that helped me was the information found on the alltrails app as well as the hiking guy at https://hikingguy.com/hiking-trails/best-la-hikes/cucamonga-peak-hike. read more


Just got back from the hike. Boy am I pooped. It was not for the faint hearted. I barely made it to the top :( Parking: buy a parking pass from the ranger station or go to a sporting goods store such as REI or Big 5 for $5. The parking lot fills up past 7:30, so expect to park along the street leading up to the Trail head lot. There are many signs that say no parking, but many people don't seem to care. I talked to a ranger there and they usually look the other way if you show your parking pass and don't obstruct the street. So please do yourself a favor and get a parking pass or expect a ticket. Pathways: There are lots of uneven surfaces and rocks throughout the way to the top. The Ice Box Trail that leads to the Cucamonga Trail is fairly wide but part of the Trail goes through a dry creek bed so there are lots of larger rocks and boulders. Once you begin to take Cucamonga Trail (the one that goes up to the peak), it becomes very narrow and rocky. Some parts of the Trail are gravelly and you even have to walk on a small stretch considered a fairly tamed skree. It becomes very steep with many switchbacks. Also, the last stretch before you get to the top, look for a ghetto sign that points towards up the hill full of rocks. That is the way to the peak. It doesn't really look like a Trail tbh. Tips/comments: -The altitude is pretty high so take it very slowly -Bring lots of water! I only brought 2L with a water bottle. That was barely enough for me. No way to refill water -Hiking shoes and poles are not necessary to complete the hike but it made my unfit self be able to survive. -There was virtually no cell reception so be extra vigilant. -No bathrooms at all; nature is your bathroom. Bury your poop 3"-6" deep -there are many hikers that do an overnight backpack trek -please have etiquette and allow people going up the Trail the right of way read more

11 years ago
This hike marks my first encounter with altitude sickness. I've been skiing in Big Bear and Mammoth, hiked Half Dome a few months ago, tackled Mt Baldy and Mt Wilson among several other higher elevation hikes recently and have never experienced anything like the nightmare I did during this hike. I'm rating it 4 STARS because it wasn't a 5 STAR experience for me. My experience was more like 1 STAR but the beauty of this hike makes it at minimum 4. What it is, is a very well marked trail which under normal circumstances makes ascending and descending to the peak pretty easy, with flowing water at the beginning and some nice scenery. We started at 845A after scoring a spot in the parking lot and posting our $5 Adventure Pass. I was sick immediately so something was just way off with me from the start, but I still decided to complete the hike which was irresponsible on my part. I struggled the entire way, not because this is a strenuous hike but due in point to the crazy headache and elevation symptoms I was experiencing. We packed in a few snacks, which I wasn't very successful at eating due to not feeling well but I did finish my 2l camelbak upon approaching the parking lot at 515P. It took us about 4 hours to reach the peak. If you are physically fit and not experiencing altitude sickness I'd say it should take less time than this. I was hiking extremely slow since I was really dizzy and out of it. Although the weather was over 90 degrees, here in the Los Angeles National Forest the temps were much cooler (around 65 when we started) along most of the trail and shaded in several areas. Packing an extra layer would be a nice to have, as some areas are cooler and windy. Although this hike is only supposed to be a little over 11 miles, some say 12. My fitbit clocked us at 16 miles. Maybe my baby steps, who knows. We stayed at the top for a little while and then began to descend. I thought my headache would cure itself as we came down but it only got worse. My boyfriend was completely fine, so perhaps my level of exhaustion and fatigue from the weeks other workouts had just taken it out of me before this hike. All in all, due to the experience I'm a bit turned off on doing this trail again although I'm sure it would be fine but I'm glad I can mark it off of the 6 peak pack challenge and move onto something else. As always pack snackies, water, sunscreen, visor/hat, tp, trash bag, charged cell phone etc. Happy Trails! And if you're feeling a bit off, I'd recommend stopping immediately and saving this hike for another day. Some advice I should have taken myself. read more


3 years ago
10 years ago
First of all, I am not much of a hiker - I've only hiked twice in my life prior to coming to Cucamonga Peak. All my other hikes prior to Cucamonga Peak were 3-4 miles round trip (which, I thought were strenuous). I didn't know what really to expect when my friend and fellow yelper Gloria C. said we'd go hiking a few months back. She had told me it'd be about 12 miles and would be fun. I read some of the Yelp reviews to prepare myself mentally -- reading about how much water to bring, how much food to bring, altitude sickness, and most vividly, BLACK TOES! Yelp reviews made me a little scared and nervous. Questions popped up in my head: "Can I do this? Can I do 12 miles? Will I make it to the top? Will I get sick? Will I get black toes?" Well, as I write this review I can say proudly that I finished the Cucamonga Peak hike and it was a lot better than I had expected or feared. We had hiked Cucamonga Peak (4300 feet elevation gain, to the top 8859 ft, total distance 11.6 miles) in about 7 hours time round trip. There were plenty of switchbacks, gravelly and narrow roads, big rocks requiring large steps, which made the journey a bit more difficult. Lots of trees, beautiful landscape, and photo ops - it's hard to believe that you're in LA when you're on this hike. I had hiked in running shoes, which didn't give me enough grip for my feet-- so my entire legs (especially, ankles and knees) were in pain for about 3-4 days. Fortunately, one of my friends lended me a hiking pole, which helped a lot with balance and relieving some of the pressure off my legs. Thankfully, my friends and I didn't get sick, nor did anyone get any black toes. I brought a 2L CamelBak with me, which provided enough water for me for the entire hike. It also gets a little chilly/windy up at the top, so it's advisable to wear layers and wear a jacket! My friends had went in May, which was fairly temperate but the wind made it feel 10 degrees colder. To date, Cucamonga Peak was the longest and most strenuous hike that I've ever completed. Many of my friends didn't think I was going to be able to make it since I had trouble hiking before. I was surprised and quite pleased with finishing the hike because there were times when I didn't think I was going to make it... but I did! I accredit my success in finishing to my friends' words of encouragement...as well as running on the treatmill with an inclinde. All in all, Cucamonga Peak has inspired me to look more into hiking and explore the great outdoors! Even though I was in pain for a few days, it was definitely worth it! Even if you can't make it to the top, the entire hike is very scenic so you'll enjoy whatever part you get up to. Definitely recommended. 5 stars! read more


8 years ago
If you want to see sprawling views of the Inland empire and train yourself for some future daunting hikes add this to your hiking resumé! CP offers a variety of different terrain and views. I highly recommend starting no later than 7am to give yourself ample time to hike back down. You'll encounter some questionable narrow and washed out areas but pay attention to your footing and you'll be fine. Majority of this hike is incline and contains numerous switchbacks. CP is way less crowded than nearby Mt. Baldy so that's a plus because I had the top to myself! There's also cool signs at the top to take pics with. This hike almost kicked my ass at times due to the harsh rocks/gravel that you encounter at about 1.7 miles in, as well as near the end, which can be especially hard on your feet/knees during both incl/decl. The trail also got confusing at times- there should definitely be more signage, so be advised about crucial junctions! I usually don't drink that much water but I fully went through my 2L hydration bladder! read more


8 years ago
HARD AS HELL!! But sooo worth it. Took my boy (dog) there a day after Christmas. Left at 4:50 am, picked up a friend and got at our starting point around 5:30. Now, we're newbies at hiking, like it was our first time hiking that high and I was carrying a 4lb water gallon for my dog plus my damn heavy professional camera and some food. We have never done any of those hiking trails before with the exception of mt. Baldy. We only knew that we had to go through the ice house canyon, so we had no idea where to go (thank god I have a good sense of direction). We thought we were lost for the first hour and a half but then we saw a sign saying "welcome to Cucamonga wilderness" or something like that. So we just kept going aimlessly until we saw some random people in front of us and then just started casually following them; well that it until they disappeared from our view. fortunately, we found another sign pointing to the devil's backbone trail, Ontario peak and some more Cucamonga wilderness. Anyway, we finally got there with trembling knees, hungry and tired asf, around 1:00 pm. Took some pictures, "rested" and ate. THE VIEW WAS WONDERFUL!! Best experience (worst too) ever! We headed back at 2:00 pm, now my boy is fat, he was tired and I needed to pee so bad I got pissed at him and my friend for being so slow and started leaving them behind little by little. It was getting dark when I noticed they weren't at my back view at all. I called my boy and he got to me in no time but lost my friend for like half an hour. We didn't have any flashlights so I had to stop and hold my pee till my friend found me, by that time it was totally dark. I had to slow down for them and Bobby (my dog) hurt his paws so he would just give up walking and had to half carry him ( that's 110 lb). I finally made it to my car with my dog in hands at 6:05, I put him inside and went back to check on my friend since she fell behind. We got home at 7:00 pm and it was sooo nice to finally be able to pee. I couldn't move for two days and my hip bones hurt like hell for a month. Oh and my friend hated me for a week. But, overall, it was a sort of nice experience... read more


8 years ago
This hike was great! A little easier than Baldy, but still a very challenging hike. Get there early because the parking lot isn't very big, but also 80% of the trails are single file. So the later you get there the more hikers you will have to share the trail with, move to the side to let others pass, etc. We started at 7am and saw very few people on the way up, but a bunch on the way down. Our distance came in just under 14 miles, and moving at a pretty steady pace (spending 15 mins at the summit) it took us 5 hours and 15 mins. We went today November 23rd, there's no snow yet but I don't think it will be long before there's a bunch. This trail would be very dangerous, advanced in the snow and ice, so take caution. read more


8 years ago
This can be by far one of the best hikes in Southern California. It's a 12 mile round trip hike, which starts at Ice House Canyon lot. You should plan to get there early like before 7am as the lot fills up really quick. Otherwise, I heard you can park on the baldy road area. But that means you have to walk a little bit to the trailhead. There are restrooms at the start of the trailhead, but bring some supplies as you may know, most hiking restrooms are filthy with no supplies. You will also want to fill out the wilderness permit, it's right next to the trailhead map of the area. It's free. But make sure you display your adventure pass which is about $5, but I tell people spend the extra for the annual pass for $30 if you plan to hike often. The start of the hike will take you to ice house canyon. There are parts of the trail that is not very well define, so keep a look out for the trail as it sort of stop then continues on like a few feet down. I had to double check at times if I veered off or right on target with the trail. There is another trail called chapman trail. It's added mileage if you want to go that route. We accidently hiked it on another outing and certain parts of that trail looks sketchy, but passable. But we stayed straight ahead this time. Once you arrive at ice house canyon. It's nothing really special, it's a place to take a break. But from here, you can break off the crowd and go to different trails from the three T's, Ontario, bighorn, and Cucamonga peak. From here, hiking to Cucamonga peak felt like another normal mountain hike, but you will start to hike down, then up, then down and back up for a few times. It wasn't an issue, but I knew we had to hike this again coming back down. So that wasn't going to be fun. NOTE - Somewhere on this trail, you will see like a split in the trail, one going straight, and another going left to steep switchbacks. There might even be a little arrow pointing left. But you want to go left and not straight. Even though, this was my first hike to this peak, I got lucky as I saw this split. I hesitated, but soon enough hikers were coming down and told me Cucamonga peak was this route. I talked to a few hikers who told me they wasted time hiking straight instead of turning left. So you want to keep a close eye on it, as wasted time hiking the wrong direction is never fun. Before you know it, you will see this hike was well worth it. I've done quite a few hikes in the Southern California area, by far one of the most popular and beautiful hike. That day, we were above the clouds. But I would hike it again just to get a clear view down below. Then hike back down:). I hiked without hiking poles, but I would recommend taking them as the rocks are loose, so the poles will help give better stability and take some pressure off your knees. As always, pack accordingly to the weather. It's never fun when you don't have the right gears in your pack. read more


9 years ago
After completing the first of the Six Pack of Peaks- Mt Wilson- I wasn't sure I was going to be all that into finishing (thanks bugs). Cucamonga Peak turned that around for me! It's shorter and in my humble opinion easier- provided you have proper gear. Trekking poles and sturdy hiking shoes are a must. Sure, you can do without, but trust me, it will make your trip so much more enjoyable. A good deal of the hike is over loose rock piles, gravel, and loose slippery dirt. Plunk down $20 for a pair of poles and revel in your newfound stability. This hike is beautiful. The first couple miles go through forested area, with a lovely stream running nearby. I felt like I was in a fairy land! The last four miles provide great views of cliffsides and alpine terrain. Then at the top you can get yourself some nice brag photos for Insta, FB, what-have-you. Tips: - Stop by any gas station or outdoor sporting store beforehand to pick up a $5 adventure pass. It must be displayed on your car dashboard if you're parking in the lot. If the lot's full, or you're a penny-pincher, you can take the turn up towards Mt Baldy and park along the road for free. - As I said before, get trekking poles and hiking shoes. Your feet will thank you! - Don't ask anyone if you're 'almost there' on the way up. Chances are, you're not. You don't want to spend the last 45 minutes up thinking the peak is just around the bend. - Bring more water and snacks than you think you need. read more


I highly recommend this hike...one of my favorite of Southern California! Distance: 11.8 miles Elevation Gain: 4,000 feet (peak is 8,859 ft) Duration: 7.5 hrs Difficulty: Strenuous We started the hike at 5:15 am Saturday morning (5/27/17) from the Ice House Canyon Trailhead Parking Lot (address- 20 Ice House Canyon Rd). There was ample parking when we arrived but when we left at about 12:45 the lot was completely full and parking on the street was full for quite some distance down the road. The trail starts off for the first 2 miles in a beautifully green area near the running creek and there are some cabins and ruins of cabins that you cross. This area stays pretty cool and shaded. The next 1.5 miles of the trail diverts from the creek as you make your way up the increasingly difficult incline to the Ice House Saddle. This is a great place to rest for a bit and catch your breath, eat a snack, and rest up for the next 2.4 miles to the peak. The saddle also has other connecting trails here such as the trail to Ontario Peak and a trail in the opposite direction called the Three T's which includes Timber, Telegraph, and Thunder Mountain peaks. From the Saddle to the peak there are some spectacular views. The trail for the first half mile is pretty tame, but the last 2 miles becomes increasingly difficult and you may start to find it harder to catch your breath when making the final steep push to the summit because of the altitude. At the peak the views are the best that I have seen in these mountains. There are two rock formations that people take pictures on...the one to the left is actually higher but it seems like more people go to the one to the right since it may be better for photographs. There was also a loose carved wooden sign to hold while taking your picture with the elevation on it. It wasn't busy on our way up since we started early but on our way down we passed so many people and this trail seems to get very busy as the day goes on. Also, your feet might start hurting on the walk down since your are stepping on so many rocks that are on the trail that are impossible to avoid. This was hike 3 of the Six Pack of Peaks Challenge we are doing. *Adventure Pass for parking is needed ($5 for a day or $30 for the year...purchase at Big 5 or REI) *I would recommend hiking shoes, poles aren't really needed, 2-3 liters of water, and snacks read more


 - Hiking Near Me - Mount Baldy, California")


9 years ago
Not as easy as Wilson...but not as tough as Mt Baldy. Get a parking pass or you'll get ticketed. Get there early, parking fills up quick. Follow the signs. Don't litter, please....thank you. We started at 6:30 and we were down by 3:30. Hydrate Shoes Socks Poles Pack GU You know the routine read more

7 years ago
The view was amazing. Took my friend and my lil sis. I know it not for kids but she push it thru it. We all had a amazing tough day but it was worth the hike read more


9 years ago
Part 2 of 6 of the Six Peak Challenge. In short, it's probably my favorite hike I've done in my life thus far. It's challenging, scenic, and rewarding. What else can you really ask for? The hikes been covered in great detail by other reviewers so I'll give a brief summary. Arrival: 6:30 at Icehouse trailhead, just got there in time to get a spot in the lot. There's parking on the side on the road below. Don't forget to do the quick permit at the trailhead and don't forget your adventure pass! Supplies: 2 Liters of Water, and a couple of granola bars, suggest a little more to be honest. I was running low on the way back but the weather was perfect, about 55 degrees and moderately windy so I was lucky. Hike Up: It is difficult. Switchbacks to the saddle for the first half and then a welcomed flat area for a half mile. You pass by an abandoned mine shaft that you can climb that into! About a mile or so after the saddle the difficulty intensifies, and you go through one last round of switchbacks for a mile and half or so and then you've made it after a short track up the hill. Top: Its epic and beautiful. Much much much more rewarding than Mt Wilson and pretty much any other hike I've done. Take all the pics you can and there are awesome rock formations that are great places to take pictures. We couldn't really find a benchmark or monument which was a bummer but there is a handmade wooden sign that calls out the peak and the elevation. Way back: Same way back as you went up. People asking you how much longer to the top is much better than you asking asking others. About 3.5 hours on the way up and 2.5 on the way down. Highly recommended and awesome hike! Shoutout to the three women who let me know about the big spider on my back on the way down! read more

. Definitely worth checking out for the experience. - Hiking Near Me - Mount Baldy, California")


7600 Ice Canyon Road Mt. Baldy, CA is what I inputted in my GPS. It took me right to the parking lot. Altitude: 8,843 ft. Distance: roughly 12 miles Time: about 6 hours. Steps: 32, 661 Today, I pushed my little brother to conquer a peak, for his very first time. Mind you, I haven't been training for Mt.Whitney anymore; I stopped 2 months ago. But, I decided I needed a good work out, too. We started our drive around 6 am, bought an adventure pass from 7/11, then got to the trailhead by 7:30 am. The lot was FULL. Ended up parking illegally on the curb, since other cars were doing it, too. A lot of people did not know about it, but luckily I did my research. There is a large stack of permits for the hike. Rangers can randomly pop up and ask and but your permit, so remember to grab one at the trailhead! White copy in box, yellow to carry on your body. We started out hike and thought it was easy; of course the trail always makes you think that. We hit the mark to Ice house Canyon and wondered why we weren't there yet. Of course we have about 3 more miles to go. The next junction up to the actual peak tires you out. It's not the worst, rest assured. But it did the deed to my little brother. My brother has hiked a few hikes, but nothing as intense or as long. He was having trouble breathing due to the change in air conditions and the altitude. So, this hike isn't great for beginners, but great for the first peak you conquer. For his first peak adventure, he was very glad he finished through all that pain. Good hike. Great view. No flag at the top anymore and no peak marker/sign at the top. Disappointing, but hey! Great hike. read more


7 years ago
Awesome and very grueling hike. 8 hr hike. 8000 feet elevation. Harder and taxing going back down. Be prepared. Water, Protein, Hiking socks, boots, trekking poles. BE PREPARED!!!! read more


DETAILED REVIEW FROM A BEGINNER HIKER! Let me start by saying that I have done a few half marathons and work out on a regular basis 2-4x/week, doing yoga pilates, boot camp type work outs and cycling. I never push myself during my workouts to the point of pure exhaustion, since I am more about enjoying the ride than breaking records or getting shredded. I am not a "hiker" though... I got a 2L Camelbak as a gift, I don't have hiking poles, hiking shoes, hiking pants etc. I hiked this hike in my Brooks running shoes, lululemon yoga pants and a light windbreaker. We hiked with a group of 7 people, this past weekend in May, and the weather had sun coming in and out, but temp probably averaged in the high 50s, low 60s. Distance: 11.6 miles Elevation: 4,300 ft gain Peak at Top: 8859 ft 6 Pack: Second peak out of Six Parking: Crowded at the bottom of Ice House Canyon Time: We hiked at a moderate pace, taking plenty of short breaks as needed and ate lunch at the top, Total 7 hours time from 8am - 3pm ALTITUDE SICKNESS? I don't hike on mountains on a regular basis. My hands swelled up like sausages, and I had a slight headache from the cold wind blowing on my head but otherwise did not feel any symptoms of altitude sickness. WHAT SHOULD I PACK IN MY BACKPACK? Back light because everything you carry will seriously weigh on your back as you hike. I brought one sliced apple, 1 light sandwich, 2 granola bars, 1 pack of carb jellies. I ended up eating some of my friend's granola and another friend's carrots so next time I will probably bring a little more food. HOW MUCH WATER? Depends on the temperature. It was pretty windy and cold so I filled my 2L camelbak and ended up only drinking about half. I took mini sips along the way but drank water the morning of and night before to make sure I was hydrated. I didn't do this, but I would recommend bringing a separate bottle of gatorade in case your camelbak breaks or leaks. Someone in a previous review recommended filling your camelbak halfway and freezing it so you could have ice cold water throughout the day? Do this if you expect it to be hot. I did this thinking it was a brilliant idea!! And then it was super cold... and I felt like I had like an ice pack on my back making me feel even colder. My friend did the same, and an ice cube froze on the spot where the tubing connects so she had to keep rubbing it with her hand to get water at the beginning of the hike. No bueno. DO I NEED POLES? No. I have hiked to ice house canyon before without it. This was my first time going the extra few miles to Cucamonga Peak and I did it without poles but I REALLLYYYY wish I had some. :( I saw people using it to support their weight going up and down the mountain. It looked very handy! Invest in some good ones... ! I bought some the day after for my next hike. DO I NEED HIKING SHOES? I did the hike in my brooks running shoes and was fine. No, I did not get black toes. Don't go out and buy new shoes and wear them for the first time on this hike. 12 miles is a long way to risk. If you have hiking shoes, it would definitely help though! I plan on investing in some legit hiking shoes and socks since this hike was so effing awesome and I plan on hiking more in the future! WHAT SHOULD I WEAR? Check the weather. Layer up. It's that simple! I really wish I would've checked the weather because I was sooooo cold majority of the time. I was wearing a tank top and pants with a windbreaker thinking it would be hot since it was already May, but it was actually quite chilly. Pack light but bring an extra long sleeve if there's any possibility that it could be cold. CAN I REALLY DO THIS? YES!!!!! I brought my fellow Yelp Buddy for life, Matt L. and he had only hiked twice in his life prior to this! With determination and good company, he made it to the top like a champ! Just put one foot in front of the other and you can do it! And if you feel very tired or sick and can't make it... then... enjoy the views that you do see, and try it again on a different day. The peak will always be there. The views on this hike were SPECTACULAR. It was a beautiful trail, well marked, and very serene. I highly recommend it! read more


CUCAMONGA PEAK AT NIGHT! After hiking this trail to the peak many times, I decided it was time to experience those city lights from the peak at night. My hike was in mid October before the time change. I hike with my pooch Sammy, so I put my flashing bicycle light on her water backpack and started our hike at 1:30 am. That gave us time to get to the peak before sunrise, take pictures of the city lights using the collapsible six foot tripod I carried along and then head back down after sunrise. http://www.yelp.com/biz_photos/cucamonga-peak-mount-baldy?userid=RoGuDu1egfAvVgb4WmZwUw#lWVRcANsAlaC6Bfop5GraA What a great peaceful hike at night! I kept my pooch behind me and looked out on the trail ahead and behind the boulders for rattle snakes. I've heard that the sometimes snakes like to heat up on the trail rocks at night. Luckily, we did not come across any snakes or wildlife that night. Oh, except for one black widow spider in a web between the rocks on the trail. So far, on all my Mt. Baldy hikes, I haven't encountered any rattle snakes... but I'm sure they are out there. It did get somewhat breezy and cold at the peak so always carry a good windbreaker and gloves. The only thing I didn't like about our night hike was the morning freeway traffic on the way home. But experiencing that AWESOME view of the city lights at night from Cucamonga Peak was well worth it. And the memories I shared with my loyal hiking partner Sammy were priceless. http://www.yelp.com/biz_photos/cucamonga-peak-mount-baldy?select=DL7-_rCTrUiYt7EPwKvZ4w&utm_campaign=www_photo_share_popup&utm_medium=copy_link&utm_source=(direct) read more


This hike is definitely not for beginners. For me personally I would consider it a 9/10. (I've hiked majority of the trails in Griffith Park, Runyon, Malibu, Santa Ana; Work out 3-4x a week/ cardio & light weight lifting) This trail is DIFFICULT (but don't let it discourage you!). Let me break it down for you. -My friend and I arrived 7:30 AM on a Saturday morning. Asked around and the "regulars" said we did not need a parking permit. -I was really intimidated. Every single person we saw in the parking lot was geared up! I hiked it with my nikes (not free runs, a little bit sturdier, forgot which kind), running pants, ankle socks, tank top, sweater, and jacket over everything. The day that we went it was extremely chilly. When we got to the top it was REALLY windy. Definitely would recommend wearing layers, longer socks (my ankles ended up getting sunburned), and hiking shoes if you have them. Something very sturdy and with ankle support. A lot of rocks you have to step through. -We packed 2 large bottles of water, 3 sandwiches, 1 banana, 2 tangerines. Ran out of food and water during the hike. Pack A LOT of water, and A LOT of food. -It took us a total of 8 1/2 hours to complete the hike. At one point I was about to have a mental break down (lol) I was cold, hungry, and my legs were hurting so badly. But once I got to the top it was SO worth it! The first 3 hours were okay. A lot of rocks to hike through, slight incline. The last hour was really difficult. Steep incline, narrow walkways, icy areas, extremely windy (my face got chapped). Really felt like I was battling it out with nature. The 4 hours down was hard on my knees and ankles. My calves are still burning and sore right now. -Friend and I got lost twice. There are not a lot of signs and the trails were a bit confusing. Don't be afraid to ask questions! If it wasn't for the other hikers we would've ended up God knows where. Overall it was a GREAT experience. I just wish I came a bit more prepared. If you stock up on food and water/ wear the right shoes i'm pretty sure you will be fine :) This hike helped me realize my love for hiking. I am planning on investing into hiking gear and start hiking outside of my comfort zone of the basic Griffith...Runyon..Etc. Sidenote: A hiker asked which trails I've been on. When I told him he responded with "Those are considered strolls" Oh Geeze. read more


9 years ago
Okay, you will never forget that view for as long as you live! I promise you that ^.^ ~ The 2nd part is a bit strenuous...it might make you go like "Bloody hell, what is this hellish torture is this??! I quit!" But once you get up there it will be more than worth it!!! There is so many cool spots to take pictures btw :D ~ Hmmm make sure you set your gps for the Ice House Canyon Trail!!! Also, do not forget to buy the California Wilderness permit for parking ^-^ ~ Anyway, be careful, and have the hike of your life. read more

11 years ago
5 stars for the workout and the views This hike is 12 miles roundtrip, out and back, with 4,300' elevation gain/loss. It is definitely not for beginners. The trail is mostly single file with lots of varying sized rocks under foot. If you take Ice House Canyon Trail (instead of the Chapman Trail) to Ice House Saddle, you will have a good, uphill workout with a steady incline most of the way. You will pass several cabins in the first 1/2 mile or so, and this part is pretty easy. Once you pass the last cabin, look ahead and the incline will get noticeably steeper. It's pretty much uphill from there. The incline is not severe to the Saddle, but it does give you a good leg and butt workout and it is hard work. Ice House Saddle is located in a heavily wooded setting and is very peaceful. There will be signs for longer and more difficult hikes, such as the 3 T's and, of course, Cucamonga Peak, which is 2.4 more miles. Once you pass the sign and continue around the other side of the mountain, it gets very windy. Even at the end of April, it was only in the 30's early AM, so check the weather before going and dress accordingly. After a short, easy bit, the trail becomes more difficult than the trail to Ice House Saddle and the altitude can cause fatigue. However, once you reach your destination, you will be rewarded with gorgeous views and interesting rock formations. It's quite stunning. parking - lot located at the start of the trail that requires an adventure pass read more


9 years ago
This is my 3rd Six-Pack Of Peaks Challenge. We started at 6am and the view of the clouds was breathtaking. My hiking buddies and I took our time. We enjoyed every step we took in the trails. The last 2.5 miles from the saddle was hard. We were stopping a lot to catch our breath due to the altitude. At the peak, the view was the best. The sea of clouds were the best view! The weather was perfect, but on the way down, my feet started hurting due to stepping on so many rocks. It's a good idea to wear blister pads for your feet to prevent getting blisters. Overall, Cucamonga Peak is worth the climb read more


10 years ago
Yes! Finally had a chance to go to Cucamonga Peak! The weather was perfect when we hiked this trail with beautiful autumn leaves everywhere and almost no wind! Having little wind is quite important for this trail since the single track trail after the saddle gets suuuper narrow with loose rocks and steep drop offs. Extreme wind can definitely make you lose your balance here (and you don't want that!!). The terrain is very rocky throughout most of the trail so watch your footing! The views are absolutely stunning at the peak and also throughout the trail. The parking lot was completely full when we got there around 8:30 AM but the trail was surprisingly not that crowded. I did see a few groups chilling near the cabins and the lower section of the trails so I'm assuming some people just come here to have a little picnic or enjoy a stroll through the woods. Total miles for this hike was 12.8 miles with a total elevation gain of 4,219 ft. It's not an easy hike but is definitely do-able and I don't recall walking through super steep sections. My biggest struggle was probably dealing with all the loose rocks! It didn't help that I was wearing brand new hiking shoes but those rocks really mess with your footing....blister time! Pit toilets are available at the parking lot. It's usually not that terrible (anything is better than the Chantry Flats restrooms!) but you may need to bring your own toilet paper. Permit is required for this hike and I have run into rangers checking permits on the Icehouse Canyon trail. The permit is free and can be found in the brown box near the map at the trailhead. Make sure you keep the yellow copy so you can show it to the ranger if they ask. Adventure pass is also required for your vehicle. Dogs are allowed on leash. Gorgeous peaceful hike!! Do it! read more


Page 1 of 3
More info about Cucamonga Peak
Mt Baldy Rd
Mount Baldy, CA 91759
Directions
Hours
Indoor Amenities
Outdoor Amenities
Ask the Community - Cucamonga Peak
Did anyone else have 16 + miles on their tracker? Signs specifically say 11 miles but seemed like more.
I was following my all trails route and got 11 but if you take the Chapman trail from Icehouse trail and then get back on Icehouse to Cucamonga Peak it could be a few more miles. That hike seemed like WAY more than 11 though. It kicked my butt haha
What is the best time to go, to have a better chance at seeing a cloudy view?
Hmm... I haven't been there on a cloudy day. For the best view above the clouds, you have to go higher I think like San Jacinto or San Gorgonio, both of which I have seen beautiful views from above the clouds. I think if you are viewing clouds from… Read more
Can you camp over night?
I briefly researched this and although most of the answers I found online were from 1+ years ago, I believe the answer is yes. Just make sure to obtain an overnight permit (~$12) at the Baldy Visitor Center or the Lytle Creek Ranger Station + the $5… Read more
Does the trail involve crossing dangerous drop offs where one has no room for error or is it a pretty wide and safe trail?
There's nothing here similar to or as scary as Mt. Baldy's devil's backbone. With that said, there are certainly some areas where a misstep, slip, or fall could cause a major problem. The trail up to the saddle is not necessarily wide, but it is… Read more
Review Highlights - Cucamonga Peak
You might also consider


Why does Yelp recommend reviews?
Cucamonga Peak - hiking - Updated June 2026
Best of Mount Baldy
People found Cucamonga Peak by searching for…
Attractions in Mount Baldy, California
Beaches in Mount Baldy, California
Beautiful Views in Mount Baldy, California
Places to Take Pictures in Mount Baldy, California
Hiking Trails With Waterfalls in Mount Baldy, California
Things to Do in Mount Baldy, California
Photo Spots in Mount Baldy, California
Parks in Mount Baldy, California
Free Snow Play in Mount Baldy, California
Scenic Drive in Mount Baldy, California
Campgrounds in Mount Baldy, California
Sunrise View in Mount Baldy, California
Scenic Views in Mount Baldy, California
Abandoned Buildings in Mount Baldy, California
Running Trails in Mount Baldy, California
Secret Spots in Mount Baldy, California
Fishing Spots in Mount Baldy, California
Walking Trails in Mount Baldy, California
Watch Sunset in Mount Baldy, California
Off Road Trails in Mount Baldy, California
Sunset View in Mount Baldy, California
Dog Friendly Things to Do in Mount Baldy, California
Browse Nearby
BEST of Mount Baldy, California Parks near Cucamonga Peak
BEST of Mount Baldy, California Coffee near Cucamonga Peak
BEST of Mount Baldy, California Restaurants near Cucamonga Peak
BEST of Mount Baldy, California Scenic View near Cucamonga Peak
BEST of Mount Baldy, California Things to Do near Cucamonga Peak
BEST of Mount Baldy, California Hot Springs near Cucamonga Peak
BEST of Mount Baldy, California Visitor Centers near Cucamonga Peak
BEST of Mount Baldy, California Breakfast near Cucamonga Peak
BEST of Mount Baldy, California Campgrounds near Cucamonga Peak