
Wine Cellar Innovations
Services - Wine Cellar Innovations
Home interior design
Wine Cellar Innovations Photos


You might also consider


More like Wine Cellar Innovations
Recommended Reviews - Wine Cellar Innovations
Start your review...


Reviews With Photos
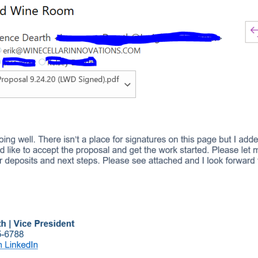
Unfortunately I do not have a positive update. Still more delays, still more poor attention to detail and customer service from the team managing this for us. We're now on month nine for this project while we've had friends build entire homes in shorter periods of time. **RESPONSE TO WINE CELLAR INNOVATIONS** I am not surprised that this company is not taking any accountability. We have a signed proposal sent in on October 5th and Wine Cellar Pro was managing the entire project, including construction. Really, really disappointing lack of customer care and accountability.


Love love my wine racks, you customize them to fit any room. Delivery was fast and they are light an super easy to install. I couldn't figure out what to do with my old pantry so I turned it into a wine closet


I was looking for a high quality solution to store my collection of vintage red wines. I found the perfect solution at Wine Cellar Innovations. I made my purchase online not really knowing what the quality of the product might be but hoping for the best. My product arrived packaged well and with no damage. The assembly was straightforward and easy with the available tools I already had. The color of stain was a perfect match to what I saw online and I now have a beautiful wine rack in my basement which all my guests compliment. I would not hesitate to purchase from this company again!


I had a great experience from start to finish with wine cellar innovations. Moved into a brand new house and had to create a new home for my 1000 bottle cellar - our WCI designer worked effectively with us to create a custom cellar top to bottom including cooling unit and lighting. All the parts arrived in great shape ; we opted to do the install locally with our builder's great carpentry team and electrician. Instructions were easy to follow and the cellar turned out great. Would highly recommend


We love our Wine Cellar wine racks. Our wine cellar is a very modest collection of about 100 bottles. The racks we orders arrived as ordered. I used a nail gun to put them together. Attached is a photo of the racks. I placed them in the center of an IKEA cabinet arrangement which form a square with the racks in the center. I also put LED rope lights behind the racks, I can change the light colors or have them change automatically fading to multi colors. We are very pleased with the results.


12 years ago

5 years ago

13 years ago

12 years ago

9 years ago

13 years ago
Business owner information

Jim D.
Hi Al, I'm very sorry to hear about your unhappiness with your…

11 years ago

11 years ago
7 years ago
9 years ago
Business owner information
Jim D.
Hi Phil - It sounds like you were in discussions to retrofit some…

13 years ago

12 years ago

9 years ago
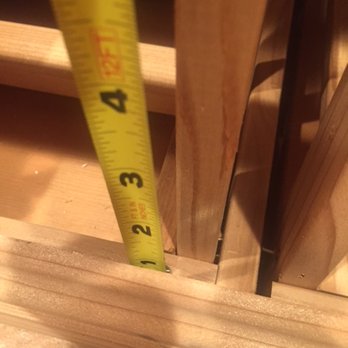
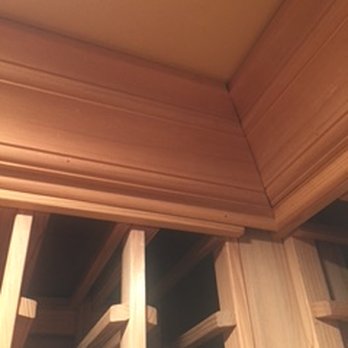
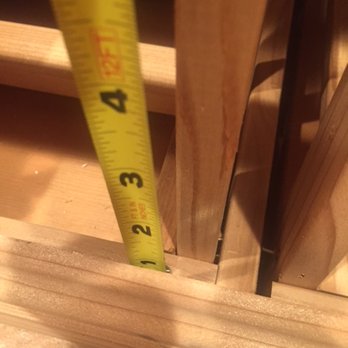
Beautiful racks. Wish I could recommend, but can't due to extensive issues with quality of the product and customer service. But A LOT of issues with the final product. Up front, customer service prior to sale was amazing. We had to delay install due to flooding in our house in Calistoga this past Winter. We finally installed it over the summer, our GC who is 5-star Diamond Certified, working primarily on major remodels, said there's no way we could have installed this system ourselves. The diamond box storage was not produced correctly, I had to pay him to fix those. There are many issues with trim in our cellar and several components not lining up. I emailed a detailed document with these pictures back on August 25th - I received no response. I followed 1 month later, on September 25th. This time I received a call and a promise that the issues would be discussed with the production team - so clearly nothing had been done in the first month since I originally sent the document/pictures. After the live discussion, nothing. No follow up call, no follow up email. So I emailed AGAIN in late October, was told that he had "tried to call me several times" - I never received a single voicemail. He told me that a box of crown molding was being shipped to me - important to note that the issue with the crown molding is only 1 of 5 issues that I documented with pictures (?????). When I questioned what was going to be done about the other issues, I was told that the production supervisor said it was likely installed incorrectly. SERIOUSLY? My GC BUILDS HOUSES. Very frustrated and disappointed that this company is not standing behind its product and fixing all of the issues. Hoping that this post will result in someone taking ownership of these issues and making an effort to resolve. read more



13 years ago

11 years ago
7 years ago
Business owner information
Jim D.
Hi Michelle, Thank you for your feedback. I reviewed the account and…
7 years ago

13 years ago

13 years ago

12 years ago
Wine racks are made of quality materials and are well constructed. It made it easy to add a great amount of wine storage to an existing pantry. I would recommend a nail gun to make things easier on the larger racks. They have a solution for almost any wine storage need. read more


11 years ago

13 years ago

13 years ago

13 years ago
10 years ago
8 years ago
Business owner information
Jim D.
Hi Ryan, I understand we've spoken with you over the phone and email…
14 years ago
11 years ago
11 years ago

10 years ago
9 years ago
9 years ago
13 years ago
11 years ago
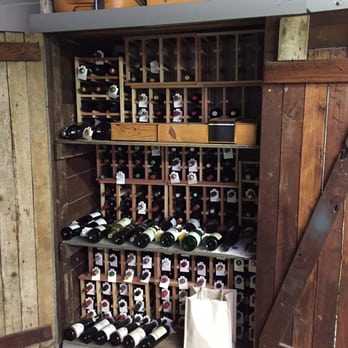
Great quality, on-time delivery and good deals. The simple and modular rackings they sell fitted the cupboard in my cellar and I bought them in small batches, as my collection grew. The factory second items were perfect for me because they match the old storage area well. They also come pre-assembled so they are very easy to install. read more

11 years ago

10 years ago
8 years ago
Business owner information
Jim D.
Hi Mark, I'm so sorry about your unfortunate experience. That was not…
15 years ago
Business owner information
Jim D.
Sean - Thank you for contacting us directly about your concern. We…
13 years ago
More info about Wine Cellar Innovations
Ask the Community - Wine Cellar Innovations
Review Highlights - Wine Cellar Innovations
You might also consider











Why does Yelp recommend reviews?
194 reviews that are not currently recommended
The reviews below are not factored into the business's overall star rating.
13 years ago

13 years ago
13 years ago
13 years ago
6 years ago
12 years ago
6 years ago
12 years ago
6 years ago
7 years ago
11 years ago

15 years ago

12 years ago
12 years ago
8 years ago

8 years ago
12 years ago
13 years ago

13 years ago
8 years ago


